Elva Fields Blog
-
#treatyoself

-
Treat Yo-Self
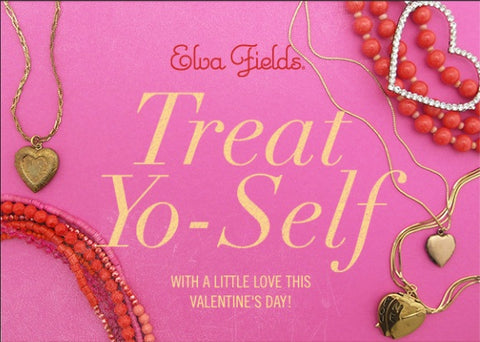

Sure it's nice to have a special someone shower you with love, affection, and heart-warming gifts on Valentine's Day, but sometimes it's even sweeter to treat yourself to something lovely. In honor of the beauty and power and wonderful-ness that is YOU, we're celebrating a little treat yo-self love here at Elva….check out our top picks for the occasion above--we each selected three Treat Yo-Self gifts (something little, something a bit bigger, and our favorite pick from the latest June Collection earrings!) Perhaps there's a little something you'd enjoy. From you to you!
XO,
The Elva Gals
Blogshop Online | Bedding | Earrings
Earrings | Piano | Oyster Subscription
XX -
A History Lesson: Pardon the Pink

Welcome to the second installment of our newest blog series, where we tell the tale of one of our jewels from conception to completion, giving the scoop on the vintage adventures that brought the materials to the studio and the crazy brainpower that shaped the design. (A little peek inside the minds of Elva...could be a ton of fun or a short trip to crazy town...either way, here we go!)
On our last buying trip of 2013, we hit the flower jackpot at a newly-discovered antique show up north...totally worth the long drive and freezing-cold Saturday investment. I had to keep myself from squealing with glee out loud (generally makes people a little uneasy, I've found) when I saw not one, not two, but THREE pale pink floral brooches huddled together inside a dusty, cracked glass case sitting on a booth table. One would have been awesome, but a triple-threat...that's my jam, folks. These buddies date to the 1930s and are made of a vintage plastic known as celluloid (the same thing film is made of) and are composed of six individual flowers applied to a disc base, creating a gorgeous cluster of petals as happy as a spring day.

I was hoping to use all three in one design (I always hesitate to split up sets...in fact, we rarely do...) but it was a little much. And you know it must have been overload if we Elva Gals say it was overdoing it. So I stuck with a pair and delighted in the fact that we'd still have one to spare for another fun design down the road. Despite polar ridiculousness outside, I was channeling a sunny spring vibe and opted for a two-tone pink idea using some of our latest bead finds, a faceted coral resin and small pale pink glass from Kenya. Here she is all ready for assembly with my chicken-scratch notes accompanying the materials on our lunch tray layout:

And here she is strung and stylish, ready to be checked...loving those blooms at the side:

And...just like that (days later...it takes us a while to get these lovelies just right) here she is--Pardon the Pink--in blooming, blossoming beauty. I love how this necklace turned out and hope it makes some lovely lady as happy to wear as it does for us just to look at it in the studio.

-
A History Lesson: Better Together

We're starting off the year here at Elva with a new feature on our blog, A History Lesson, that grew out of a brainstorm about our vintage adventures and the many unique stories we love about our one-of-a-kind jewels. Short of inviting each of you to the studio (though you're always welcome!) we thought we'd tell some tales here on the site...sort of walk you through how a design came to be--from discovery of the vintage element(s) to the completion of the creation, giving you a bit of history on some of our favorite finds and the creative process involved. Think of it as the Elva version of VH1's Behind the Music. But sparklier. (And hopefully no stints in rehab. Yet.)

So, with each collection update this year, we'll highlight one style and give you A History Lesson...hopefully one worth learning and entirely without note-taking or final exams. First up, our "Better Together" necklace, freshly-added to our Elva Collection today! In an effort to start out honestly, we must let you know that this design was originally intended (and included) as part of our Holiday 2013 Collection, even making its way to some fun magazine photo shoots and then back to our studio in early December for the launch...but somehow someone (me) skipped over it when writing copy for our Holiday necklaces, and it sat (sadly) forgotten on our shelves for a few weeks. Here she is now in all her glory, getting her long overdue story told in the spotlight!
I first discovered the pair of ladybug brooches in a favorite antique haunt in South Florida. I almost overlooked them, nearly-hidden as they were in a tall rotating case filled with sparkly goodies--just around the corner from this beauty that almost came home with me, actually. Between the beautiful colored rhinestones (likely of Austrian origin) and the costume pearls, these little ladies were too amazing and adorable to pass by, and once I noticed that they were made by Kramer of New York, I knew they had to be part of the Elva fun. Kramer was a costume jewelry firm founded in the 1940s and consistently made quality, higher-end designs through the 1970s, including some for fashion label Christian Dior. These beautiful bugs are likely from the 60s, and would have been worn together, perhaps on the lapel of a ladies' jacket or on a sweater...adding just a touch of cheerful glamour to the occasion.

Just a few weeks later I headed to market for bead-buying, where I quickly snagged a set of vintage glass pearl strands from a vendor who specializes in unique vintage findings and beads, particularly items discovered in a warehouse filled with dead-stock jewelry components from the 30s through the 60s. (As a side note, I am equally devastated and thrilled I've not yet found my own abandoned warehouse full of goodies...I might never emerge, but it would be a ton of fun digging through the awesomeness, and I might be willing to stay there forever.)

Once back in the studio, I noticed the pearls matched the finish and luster of the jewels used for the bugs' bodies perfectly, and I couldn't resist pairing them together. Elegant and charming, the arrangement seemed a fun mix, hitting the right notes of sophistication and whimsy, with such a tale to tell! Can't wait to see who might add the fun to their collection and continue the story of these jewels.
And that, friends, is your first History Lesson, Elva-style!
-
See You Next Year!

We'll leave you at this year's end with our happiest wishes for simple pleasures, frequent smiles, warm hearts, unexpected joys, and sincerest kindness. From our small town Main Street studio, all the very best to our wonderful, dear customers, friends, and family.
See you in 2014 with much fun ahead!
XO,
The Elva Gals


