Elva Fields Blog
-
What's Your Sign?

A sign of true and unique style, these zodiac pendant necklaces were a fun find on a recent vintage adventure...lovely for layering or strong enough to stand-out solo. With gorgeous detail, their goldtone finish is remarkably pristine, and on sale this week at over half their original price, they'd make a wonderfully fun gift for a gal pal or for yourself! Shop the styles here...and happy end-of-the-week to you, friends!
http://shop.elvafields.com/collections/just-in/products/necklace-543
-
Spring Studio Visits
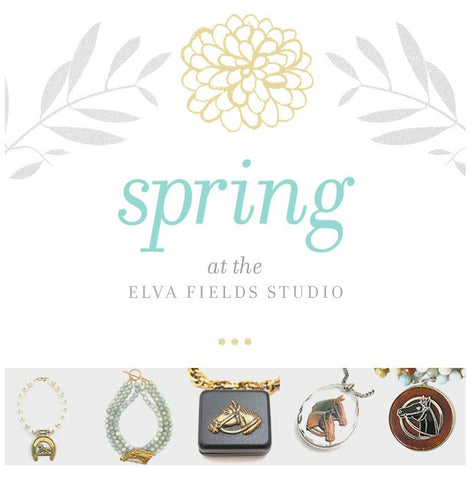
The countdown is on for horse-lovers here in the Bluegrass, as Derby Day is just 'round the corner! Grab some girlfriends and your race-day dresses and head out to our studio to find the perfect jewels for the occasion. Enjoy refreshments, full access to our vintage and bead archives, and shop the collection with special pricing--we'd love to have you visit! Appointments available starting April 1st.
Contact us for details or appointments!
-
Spring 2014 Collection
All images and jewelry © Elva Fields, 2013.
-
The Monday Match-Up

 Starting your week off right, we've added a new series to our blog that pairs two of our favorite jewels in a two-is-better-than-one philosophy. (You KNOW more is always more around here!) Consider it Monday Funday! For twenty-four lovely hours each week, we'll offer a match-made-in-heaven pairing (often a necklace with a pair of earrings designed especially for the look) at a special price, and this week is a favorite black and turquoise blue beauty.This week, we've swapped out our typical necklace for one of our fun Original Vintage finds, a vintage goldtone cuff bracelet showing off some striking faux coral cabochon jewels. Paired with earrings of red Asian glass and 14 karat gold filled wires, this is a true dynamic duo showing style with simplicity.Shop the Match-Up here.
 -
The Monday Match-Up


Starting your week off right, we've added a new series to our blog that pairs two of our favorite jewels in a two-is-better-than-one philosophy. (You KNOW more is always more around here!) Consider it Monday Funday! For twenty-four lovely hours each week, we'll offer a match-made-in-heaven pairing (often a necklace with a pair of earrings designed especially for the look) at a special price, and this week is a favorite black and turquoise blue beauty.
"Aspirations of Joy" shows off three strands of faceted black obsidian beads, a striking setting for a vintage turquoise glass and pale blue rhinestone jeweled blossom brooch at the side, while a gilt copper toggle fastens the design at back. Measures in length. The accompanying earrings originally came as a set with the brooch (a fun find from a favorite flea!) and have been transferred from clip backs to 14 karat gold filled ear wires, each measuring from hook's curve to pendant's point.
Shop the pairing here: "Monday Match-up"


