Elva Fields Blog
Handmade Holiday: DIY #3

We're continuing our craftiness in the studio this week with our third DIY of the month...and, though this one turned out NOTHING like the images that first caught our eye for the project, we had such fun improvising and think the results turned out unexpectedly awesome.
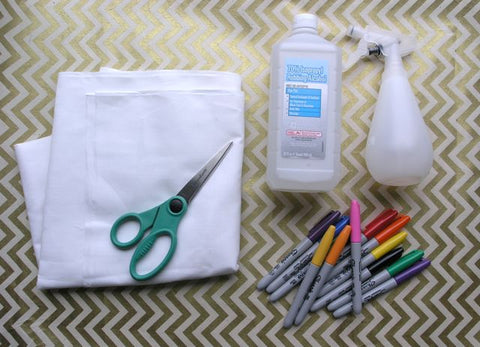
For starters, you don't need much. A plain white, loose-weave cotton fabric (muslin), rubbing alcohol, a spray bottle, scissors, and Sharpies. (You might also snag a plastic bag or piece of newspaper to place under your fabric while you're working...just to keep the colors from transferring to your work surface.)
Start with a bit of the fabric...depending on what you plan to do with it (we'll be framing ours) cut the size accordingly.
![]()
Live it up with some free-hand decorating...think about how colors might blend and run together...and just go for it. No rhyme or reason, just do what strikes your fancy, friends.

Here's a close-up of our artistic genius: (truly, our five-year old could have done this, I think!)

Now spray the fabric with the alcohol...really drench it for the best blurring.

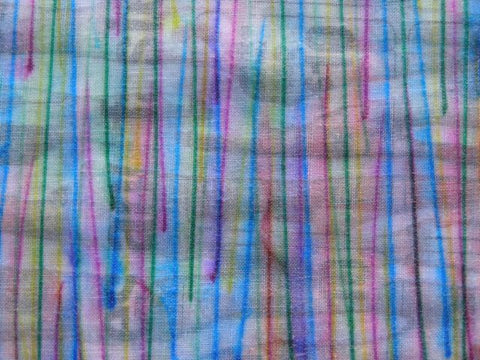
Here's a pic of another design we drew, showing just a small section that has been sprayed...you'll see the effects immediately, but set it aside for a few minutes to let the magic really happen.

And here we are with a few of our designs...a bit tie-dye, a bit watercolor, entirely fun. (You can iron them at this point to rid of wrinkles and semi-set the color in the fabric, but we opted to leave ours alone.)

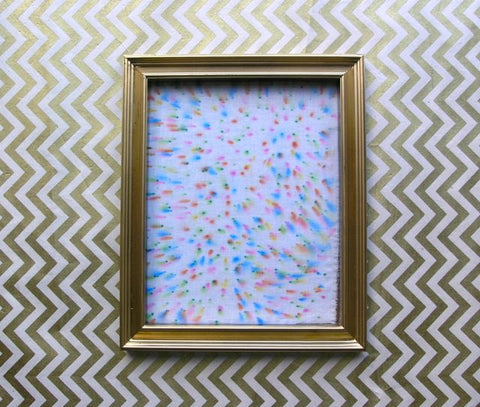
Framed and placed as part of a gallery wall, this could be such a cool addition to a colorful collection of art! (We snagged this frame at a dollar store and spray-painted it gold...looks so much fancier than that, right?)
Or in a simple IKEA frame...the matted presentation makes it seem like legit art. And it is...yay, you for creating something unique! Have fun!
